Adjusting a Door Hanging
The way a door hangs on the framing can be adjusted. To reset it some tools and materials are needed:
- a hammer, block of wood and nail set(s)
- utility knife
- prybar & cat claw
- rigid putty knife or 5-in-1 tool
- level
- pair of vise grips
- optional: metal cutting jab saw
- materials: shim packet, and finish nails for cinching both jamb & casing
- optional: rag and putty for holes and caulking
1) The first step is to view the door. Test swing it. See if it closes right.
Check the level of the wall and the door. The door should be level at the head and the sides of the
jamb. Usually, you can expect to pull the casings to find out what is possible.
2) Remove the trim/casing. For painted trim, take a utility knife and score the caulking bond. This will prevent the wood
from splintering, and leave the drywall paper intact. Trim that is stained or naturally finished is generally
not caulked to the wall.
3) With the 5-in-1 tool or a strong putty knife, begin prying the trim from the wall and jamb, working up and down the
areas of the casing, being cautious of making indentations for softer woods on the casing side. Be prepared to deal with cross
nailing at the 90 degree angles. Also, older trim is susceptible to split. Nails remaining in the trim are to be removed
by pulling through from the backside with a pair vise grips and not tapped back through but this depends on the wood.

Set the casing out in the order it was removed.
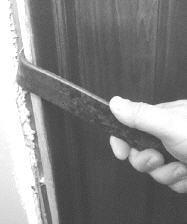
4) To move the jamb toward the door, turn the angle end of the pry bar behind the jamb.
Lift the jamb as needed.
Close the door to see the spacing. If the head jamb
is holding back the needed adjustment, you might need to cut its nails with the jab saw.
Check with at least a 2' level.
When the preferred position is near, test close the door. Then shim as needed. Double check the jamb position,
then nail back in place with finish nails.

If the jamb is to move toward the framing, then remove the existing
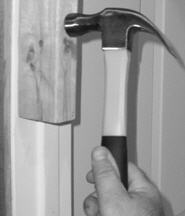
shimming with your hammer. Tap the jamb with a hammer and wood block.
Placing shimming as needed afterward, to slightly raise the jamb section
from the framing. Then finish nail in place.
If the jamb head is out of level, one or both sides will have to be raised or lowered and to do this the nails will first have
to be severed with a jab saw.
Do not countersink the nails with the nail set until you are sure that the head and side jambs are secured square and level on the wall, with the door
closing properly. Even for the inner jamb.
5) Break off the shim ends with your hammer.
6) Re-attaching casings - make note of any reductions or expansions in jamb widths or heights, as casings may need to be cut
or replaced.
Clean down the backside of the casings, and the wall, with the 5-in-1 tool. Then nail the trim back; starting at a top joint
hinge side, to maintain the mitre, and while establishing the levels, nail the casing to the stud on either of the adjoining pieces
and then the jamb edges, noting that the studs take larger finish nails. Next do the other corner in alignment, and secure the
upper sides over an area before cross nailing back at the mitres (the joints should close before cross nailing)
Figure beforehand if prior paint lines can be relied on as guides, taking into account the new shift.
7) Putty nail holes and clean with a damp rag. Tint-putty natural finishes (and look into into if these need sealed or varnished)
and putty and caulk any painted finishes.


 If the jamb is to move toward the framing, then remove the existing
shimming with your hammer. Tap the jamb with a hammer and wood block.
Placing shimming as needed afterward, to slightly raise the jamb section
from the framing. Then finish nail in place.