Major Tile Setting Factors
There are commonly overlooked areas of concern when you are setting your tile in the bathroom,
especially, but also in the kitchen and other areas.
Not all tile setters use the same methods for tile and while some methods are justified, others are
only methods that are long on saving on time and effort and short on resulting in a quality that lasts.
The following assumes that a durable tile has first been selected for the given application, for example
ceramic tile and not clay for indoor areas.
Condition of Subfloor
The long term integrity of the install will be determined to a large degree by
the soundness of the subfloor. A floor built of wood beneath should be solid, and not detectably
bouncy. If it unsound, the subfloor may benefit from reinforcing. For cinching framed flooring,
methods such as driving added screws, shimming from beneath and/or adding joist bridging could be options.
Cracked slabs that are weakened should be repaired by patching or even replacing a section.
Floor areas around toilets are notorious for having rough foundation pours and see these areas.
If there is vinyl prior to the tiling, be aware that a rigid tile plane will be less forgiving
depending on the dimensions of tile being set. Some installers rely on adhesives to form a build-up, but
adhesives do have a maximum recommended application thickness. To level the uneveness there are easy pour self-levelers.
Backer Boards & Membranes
Often tiles are applied right over plywood, tile, or what you. This is not always recommended however
and the entire substrate must be considered at every layer, including from the joists to the plywood to the
backer board, if so used. Yet an additional layer may also be added and this is a membrane that basically acts
as a moisture barrier, such as chlorinated polyethylene (CPE). Other options include brushed or troweled-on solutions
that act toward the same cause.
Through all of this, the total new weight load for floor area should be considered as new tile
often adds to the structural load. This is less of a concern for walls under most circumstances,
although the walls might be either doubled-up with drywall or cementitious backer board installed.
Adhesives
Some of the ready-mixed mastics offer quick and easy application from premixed buckets. But which
do have performance limitations. As a rule these do not have the bonding ability of thin set, or dry-set mortars.
Noting that some mortars have acrylic additives to form stronger bonds.
Another alternative is epoxy mortar at the upper end of the price scale. Epoxy adhesive MUST be
compatible with the tile and the substrate to which it is being applied
and be flexible enough
to endure movement.
Spacers
There is often, heard the claim of setting tiles without inserting spacers, and in so doing, still achieving a consistent spacing.
In the rare case, this could be true. However frequently it is being done to simply avoid placing each individual spacer
along with their later removal.
Exceptions to this are either tiles that are (a) round cornered or
irregular or (b) tiles that are self-spacing. Meaning that they have lugs integrated
into their design that allow for equal spacing, albeit at a predetermined width.
At any rate, placing the spacers helps maintain grout line consistency at several
widths such as
the typical 1/8", 1/4" & 3/16" and 1/2" thicknesses for larger-tiled patterns.
Grout
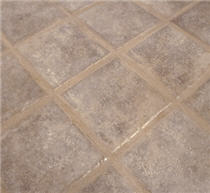
Grout of course imbues color to the overall design but its purpose is also to
assist in sealing out moisture elements. Unsanded grout is typically
used for thin grout lines such as for 1/6" to 1/8" joints and less, and sanded grout
for those that are greater. For areas of increased resistance to staining, epoxy
grout
is likely
an
option.
Additives are available for enhancing
both water and stain protection.
Grout must be floated into the joint, to completely fill the channel. Not merely a top
skimming to close what is seen.
Sealing
As a rule, the task of sealing the joints with a
grout sealer follows at a cure time interval following
installation and this does not include any caulking, which is for joints that are subject to expansion and contraction.
Maintaining the grout will help preserve its color for over longer periods and most importantly, will help shield away
moisture. Sealed grouts that have had some set time should be cleaned before resealing them,
partly to remove any existing discoloration.
Tile sealers may be either penetrating or coat the surface.
They generally serve the same purpose.
 Spares
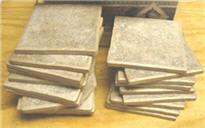
For future replacements there must be usuable spares that are kept in a dry
place. Since matching tiles may no longer be made. A chipped or damaged tile should not have to sacrifice the whole floor.
Also keep spare grout mix sealed airtight. And possibly the same sealer, to maintain
compatibility.
Floor Heights
Connecting newly installed floors with the existing should run continuously. Doors operating freely. To help ensure this:
- Design a substrate system that best mates on-level with the bordering area(s), with the tile not exceeding this.
- Account for door cuts to be made.


 Spares