Exterior Painting: House Painting Preparation
When it comes to the duration of an exterior house painting,
this is clearly based on preparation, quality of materials and skillful application.
The types of preparation that are involved will depend on the kinds of exterior surfaces that are being prepared,
the degree of any damage, the amount of weathertightness that you wish to achieve, such as with
caulking done at the same time, and the
amount of preparation that is being anticipated on the project. Along with the budget to carry this out.
Cleaning
Painted stucco, especially situated in regions of high sun exposure,
should be pressure-washed to clean and remove any chalk residue, that is basically the
accumulated breakdown of the paint surface.
Exterior flooring too may call for pressure washing, as it is usually
a good idea to wash the surfaces with an appropriately diluted,
mild detergent, then rinsed( but always use caution, as excessive
or concentrated pressure or simple aiming can cause damage, infiltrating into the house).
So take extra caution.
At the minimum, areas that cannot be water cleaned should be vigorously
cleaned with a duster, meaning an old wide paint brush that has been retired.
Any heavy debris or sediment should be removed prior to advanced preparation.
Eves that harbor dust and spider webs are common areas in need of cleaning.
In general terms, clean from the top down.
Patching/Replacement
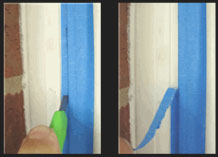
After fully cleaned and dry, view all surfaces and mark with blue
masking if necessary areas to receive patching (whether cementitious,
wood, composite, or what have you).
Proceed by replacing as needed, with the recommended product and installation
or application sequence ( example; wood siding follows a course) and make sure
any exterior patching products applied are of the highest quality
as a great number of product claims simply fail to hold up to
the demands of weather, the freezing and temperature extremes.
Get recommendations. But as a rule it is generally best to replace
rather than patch, not only are exterior patches hard to sand, they don't match texturally
and expand & contract at inconsistent rates.
Details
- Remove any rust completely away from metal and treat with a rust inhibiting primer. Sanding with emery cloth for surface rust.
- Countersink any protruding nailheads and patch as needed. Depending on your choice of patch, since many really don't
sand to a smooth finish, you might choose to tool the compound close to the plane of surface or go with a putty for the smaller holes,
wiping with a damp rag.
- Scrape and remove any loose or lifting paint, and sand and prime as needed. Taking precautions for lead base paint if needed.
Caulking - removed failing caulking and cut out if necessary.
Before applying a fresh new bead, compensating for shrinkage due to drying while
following manufacturers' specifications.
Masking/Protection
If spraying, masking areas sufficiently. Continuing farther
off for solvent based paint application - though it is generally not the
best idea to be spraying where any drift is even possible.
Handheld maskers come in handy, wherever overspray or ‘fall’ is
anticipated. Though masking should be done, not too in-advance
of painting, as the sun can lift it particularly from rough areas
and bake the tape to stick, if left to stay for too long a period.
This can happen even for tape designed and advertised to withstand lengthier periods.
Moisten down plants and vegetation that are to be covered with sheets of plastic.
Leave openings in the upper plastic if possible, for ventilation.
Cover all areas with protective canvas drop clothes.

