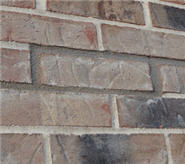
How to Replace Brick

A loose or damaged brick on your wall should be replaced and maintained along with the remainder of the
brick courses. It will not only look better, this will help guard against moisture and water from entering into
the inner wall. To remove the brick with joint and then go on to repoint:
1) Clear the perimeter joint. Since the removal must continue to a depth sufficient to free the brick member, this may involve
using an even, more narrow joint chisel for maneuvering. You will want to remove areas limiting the outer area to come off first,
(pointing the chisel inward, toward the direction of the damaged joints) and this will minimize the damage from removal.
If possible, clear upright joints as a whole that are away from the damaged perimeter; either by replacing them entirely or nothing at all.
Which should make the finished repointing less conspicuous.
2) Remove the damaged or loose brick. If it is cracked or split, remove the outwardly-available pieces first and then free the
inner remainder completely. Preventing infall to the inner wall if possible. Be sure that the rectangular void is adequately clear
to both accept the new brick and masonry layer.
3) Clean the area of any debris with a compressor nozzle or brush.
4) Prepare the replacement brick. This should have been stored in-doors and not outside.
To cut a brick unit; stand it on-edge lengthwise, and mark the desired measurement with a pencil.
Hold a brick set tool with the angle cut-end, positioned toward the scrap side, and then strike the set with a ball peen
hammer enough to score the surface. Doing this next on the opposite side. Then hit it harder to split the brick.
If this is inaccurate, or if there are multiple bricks that need to be replaced, consider the use of either
a powered angle grinder with a masonry blade or a masonry wet saw.
If the chosen replacement has mortar, this can be cleaned with an angle grinder. Noting that the grinder sends almost no
shock to the brick, making it the preference for aged bricks. If the damage to the brick being replaced is minimal,
there could be the chance of reversing it, and the angle grinder is great for cleaning salvaged bricks.
Push the brick in the opening, to test the space around the sides, before actually
setting it with mortar (with a spacer at the bottom).
5) Apply water mist from a spray bottle, entering to the depth of the joint. No excess water should form.
Let the moisture penetrate the surface.
6) Trowel on mortar around the four inner sides.
7) Set the brick - sliding it on-level from a wooden platform or a hawk. Be sure the outer face is level with those around it
and the joints are the same.
8) Add mortar, and pack it in flush with the point blade. Then tool the mortar, usually with a concave shaped "half-round" - depending on your
joint style, though this could be a flush joint or other styles. The joint should match the surrounding ones, accounting for almost no settle-back.
The mortar mix should be that it holds the position of the brick while not allowing for any sinkage at the bottom.
9) Take a wet rag and blend off the new joints
10) Clean any remaining residue with water and a sponge. Wringing and rinsing in clean water repeatedly.

 A loose or damaged brick on your wall should be replaced and maintained along with the remainder of the
brick courses. It will not only look better, this will help guard against moisture and water from entering into
the inner wall. To remove the brick with joint and then go on to repoint: