Sealing Brick
One preventative step that can help guard against future cracking, spalling or flaking and even
to ward off moisture from entering through the brick though not through the cracks is applying
a quality sealer
[ see sealing notes ]. Ideally, this sealer will allow the moisture to escape from within the existing brick
and mortar joints while not allowing moisture to penetrate back into the brick and airspace.
1) In most cases, the mortared bricks should first be pressure washed to remove any surface deposits
that have accumulated, which will allow the sealer to penetrate.
2) Cut several rigid strips of cardboard to use as spray shields. These will go under the lowest course and held
up against any areas not to receive the sealer, to protect them.
Areas that are not brick and masonry should not be
sealed.
3) After the washed wall has been allowed to thoroughly dry, mask off any areas that cannot be shielded.
Protect the plants with vented protective sheeting - and only cover them only as long as needed. The plastic will
contain the heat so remove this asap.
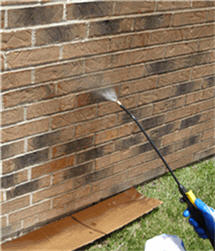
4) See that the sealer is okay to apply by popping the containers. Then fill the pump spray.
The sprayers equipped with definite turn-locks are
held together from the pump handle.
Caution: it is important that your sprayer does have a
fan tip (brass tips are best)
and a
secure lock at the handle. It is advisable that the handle be tested prior to using and that it does not
release.

Spray test the liquid sealer on a piece of the cut cardboard before starting. The sealer can also be applied by brush and
roller although the spray method is generally the method selected: it is quicker, requires not much brushing (but does require shielding)
and the sealer is in a vessel.
Caution: roller hairs can be left on rough bricks such as the wire cut
faces.
5) Wearing protective gloves and eyewear, start at the bottom and work upward, saturating the brick in a continuous pattern.
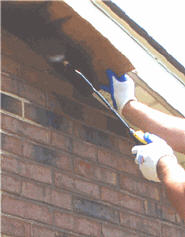
Quickly cut in areas with a brush, such as window insets, just prior to spraying, while working a 'wet edge'.
6) Pull the masking and quickly clean any areas such as glass windows before the material is allowed to achieve a set.
7) Empty the sprayer and clean it. Run water or solvent cleaner through it (depending on your sealer) and run water through the line last.
To keep the line clear, the parts together, and to dedicate it for 'chemical use', it is generally best to box it away for the next time.


 Spray test the liquid sealer on a piece of the cut cardboard before starting. The sealer can also be applied by brush and
roller although the spray method is generally the method selected: it is quicker, requires not much brushing (but does require shielding)
and the sealer is in a vessel.