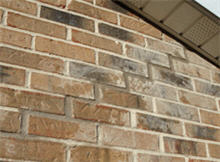
TuckPointing Notes
To replace the mortar effectively, there are some particulars that affect the finished repair project on your brick.
Clearing Joints - Relieving Stress. Probably the core issue,
when it comes to repointing, is safely and cleanly removing the old joints. To
achieve this, a narrower joint cold chisel might be needed other than the actual
joint width. To relieve or minimize joint stress as it is being removed, the
central part of the joint should first be removed. Then any mortar stuck
on the brick.
First determine and confine the exact lengths to be removed. Chisel an
opening at one end, removing the mortar, angling the waste side of the chisel
tip angle from one side to the other, while working toward a cone, carefully
going deeper and deeper until a void is created. This will be an end point and
the
removal
should progress
toward an opening - since adding impact on the filled mortar
is likelier to extend the failing joint with any under the surface unseen.
An alternative is an angle grinder fitted with a masonry blade. But beware, straightness and accuracy have to be applied
to avoid miscuts into the brick faces.
Mortar Mixing / Bonding Agents. Mixing the mortar is not always
a straightforward task. Although, additives can be mixed-in for stronger bonds
based on your application, be cautious of the proper mixing ratios
since too much water can actually prohibit a proper drying cycle.
Many recent applications can do with a straight commercial grade Type S mortar,
where only water is added. Others require that the lime and cement be mixed
seperately. Masonry suppliers can be indispensable when it comes
to these formulations and they may want to see brick and mortar samples.
Options for mixing the mortar include: the hand trowel for smaller repeat batches,
the mortar hoe, which is basically a hoe with holes in it,
and the heavy duty mixing drill equipped with a paddle.
When mixing to desired consistency, track water amounts as you add with a measuring
quart container to easily duplicate the same on future batches. Mix conservatively
to start, perhaps a 1/2 gallon. Re-tempering the mix is normally not recommended.
Mortar Colorants. Mix colorants in
measured tablespoon and even teaspoon quantities. Taking all precautions to
avoid breathing, and skin and eye contact as some colorants are toxic.
Mix samples, and allow adequate time before comparing tests with clean mortar
joints being matched.
Tooling Joints. "Half-round" jointer tools are available in
different arcs to form concave joints (pictured above before residue cleaning).
The double-end jointers are also available for 'V joints'. A raked joint is
scraped out with a square pattern tool to about 1/4" to 3/4" depth, creating
a shadow from the recess. The flush joint is scraped level with a trowel edge.
Brick Availability. Damaging bricks on joint removal can usually
be avoided. But sometimes it is unavoidable. Focusing on the fact that some
bricks are no longer available for replacement, the repointing process should take all efforts in
protecting the existing bricks that are already in place.

