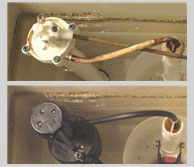
How to Replace the Toilet Fill Valve/Ball Cock
If your toilet either constantly runs, does not shut on and off distinctly, or emits a confined spray, due to partial clogging,
all while leaking fails to take place at the flapper, the toilet likely needs a new fill valve installed. Certainly, it is always
best to replace the guts in the tank if they are at all in question.
Replacing a component ball float mechanism with a kit is really hit or miss. The problem is normally in the diaphragm. So again,
it is generally best to put in an entire fill valve, some of which come with accompanying flapper assemblies.
Before beginning, look at the filled water level in the tank. If it generally gives decent service, measure the distance from the
tank top and record this, it will be soon transferred.
1) Turn off the water supply and flush the commode until it is mostly empty. Pad out the remainder in the inner tank with paper
towels and wipe down before any new mechanism is placed. You may want to mark the old water level inside
the tank now.
2) Place an empty bucket or pan under the outer supply line/nut, realizing that the water will track down to an extent.
3) Threaded under the left side of the tank, unturn the water line coupling nut. Then, inside the tank, disconnect the refill tube from
the overflow. For older floats, remove the float ball, getting it out of the way.
4) Screw loose the lower lock nut, that acts as a retainer on the plastic valve pipe.
5) Having disconnected the lower supply line, wiggle loose the existing fill value and remove it from the tank.
6) Set the base of the new valve in the tank hole with the new upper rubber gasket in-place. View the desired
water level. Removing the valve, adjust the height of the float cup. Adjusting this could take a couple of attempts.
At this point though you just need to get it near enough, within range.
7) Set the base at the right float cup level, holding it upright from above. At the underside, place a washer
over the bottom thread and turn the new locking nut on to retain it, and then tighten. Take care at overtightening the plastic
even though some models have "anti-stripping" characteristics.
8) Connect the supply line with plumbers tape, to prevent leakage. Tighten it secure.
9) Reconnect the refill tube inside the tank. Turn the supply line back on and fill the tank, watching the lower connection for signs
of any leaking or even big slow-building drips. If this occur, be ready to gradually tighten the connection.
10) With the tank full, adjust the float cup by depressing the attached spring-clip for sliding up and down.
The water level should rest approximately an inch under the top of the overflow (based on your model) assuming this meets your needs.
Setting it lower will conserve on water.
- For some tanks there are plastic liners available for lowering water volume.

