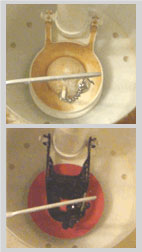
How to Replace the Toilet Flapper
A constantly running toilet is frequently caused by a flapper that refuses to lower shut.
There are universal flappers and then there are those that fit certain makes. Therefor, before you
secure a new flapper, it is recommended to first locate the make and model on the tank.
This is possibly located at the inner rear wall.
Bring the worn flapper in to verify the match at the store. You might also need the shape of the flush valve, such
as for Kohler. And make note if there is a lower, independent gasket seal or rubber seat that meets the
flapper on closing.
To replace the flapper;
1) Shut off the water supply line valve.
2) Flush the toilet and allow the tank to become empty - with the existing flapper remaining open to enable draining.
3) Detach the flapper from the tall overflow tube. For a collar mount flapper, first scrape clean any lime deposits from
the tube and then slip the collar up and off. Pivot-mount flappers are snapped, or clipped off from the lower sides.
4) Remove the chain from both the upper arm and the flapper.
5) Connect the chain at the replacement flap end, and set it in. Place in a new seat gasket or seal if it takes one, some are held by
a tension rim, and some may come with silicone for sealing. Some flat gaskets settle into the seat contour from the weight of the flapper.
6) With the flapper installed, hook on the upper end of the chain. Then move the flush lever. The flapper
should pull up quick and then slowly downward.
7) Turn the water on and fill the tank. There should be a distinct shut-off.
8) Flush again, verifying a 'water actuated' lowering of the flapper. No seepage should be heard when the tank is refilled.

