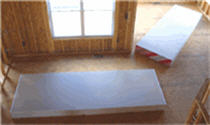
How To Install Drywall
Determine sheet sizes and their allocations - with the idea that
custom orders can take time and may have to be backordered, depending
on local market conditions. It is important that this be done asap due to any
unforeseeable shortages in supply and requirements for special order lead times.
As a rule, ceilings normally get the larger than 4x8 standard sheets. But walls can
take the large sheets as well. Keep in mind that walls higher that 9 foot ceilings can
usually take the 54" sheets since the 4x8's would require an extra strip
and therefore, eliminating a seam.
Familiarize yourself with factors like the types of drywall that are going up; greenboard,
a normal drywall, fire rated, and which thickness you will be going with. Included in your plan
the areas might take cement board for later stone or tiling even if you are not installing it yourself.
View all ceilings and walls, breaking the ceiling into 12' drywall sheets and going from there.
Don't forget to allow for waste due to ripping or any breakage.
After you are clear on the fact that all wall and ceiling cavities are ready to be closed-up,
before proceeding, determine if there is a power source for corded drivers or whether you will
be going cordless. This can be easily overlooked by the infrequent hanger of drywall since
these phases fall so close together.
Note all cutouts to be mad: including for electrical outlets, switches,
for hvac ducts and everything. Come up a basic diagram for outlets - these are very easy to close over.
Inspect walls for irregularities and place backers for attaching corner sheets.
Build up wall studs with drywall shims in areas that are out of level. This can prevent expansion
and possibly breakage of the wallboard when fixing it to the bracing.
Fasten the drywall sheets to the studs with coarse thread drywall screws and a drywall gun.
While a cordless drill could potentially be used for the task, the driver designed for setting
drywall screws per se is best suited because the integrated depth gauge achieves an optimal countersink
that is crucial for getting a good smooth finish.
Whereas the cordless screwdriver
finds a stop-in-motion, based on an internal clutch device (rather than setting depth).
You should work following straight lines on the studs. Typically they are 16" on center
(but not always). If it helps, fasten screws with the aid of a stud finder (a higher end finder, for better detection).
Any missed hits are removed by manually turning with a screwdriver back out or by slow
reversal given a magnetic driver tip.
Be sure to check for proper countersink of all screw heads when the hanging
is complete in preparation for mudding and sanding.

